|
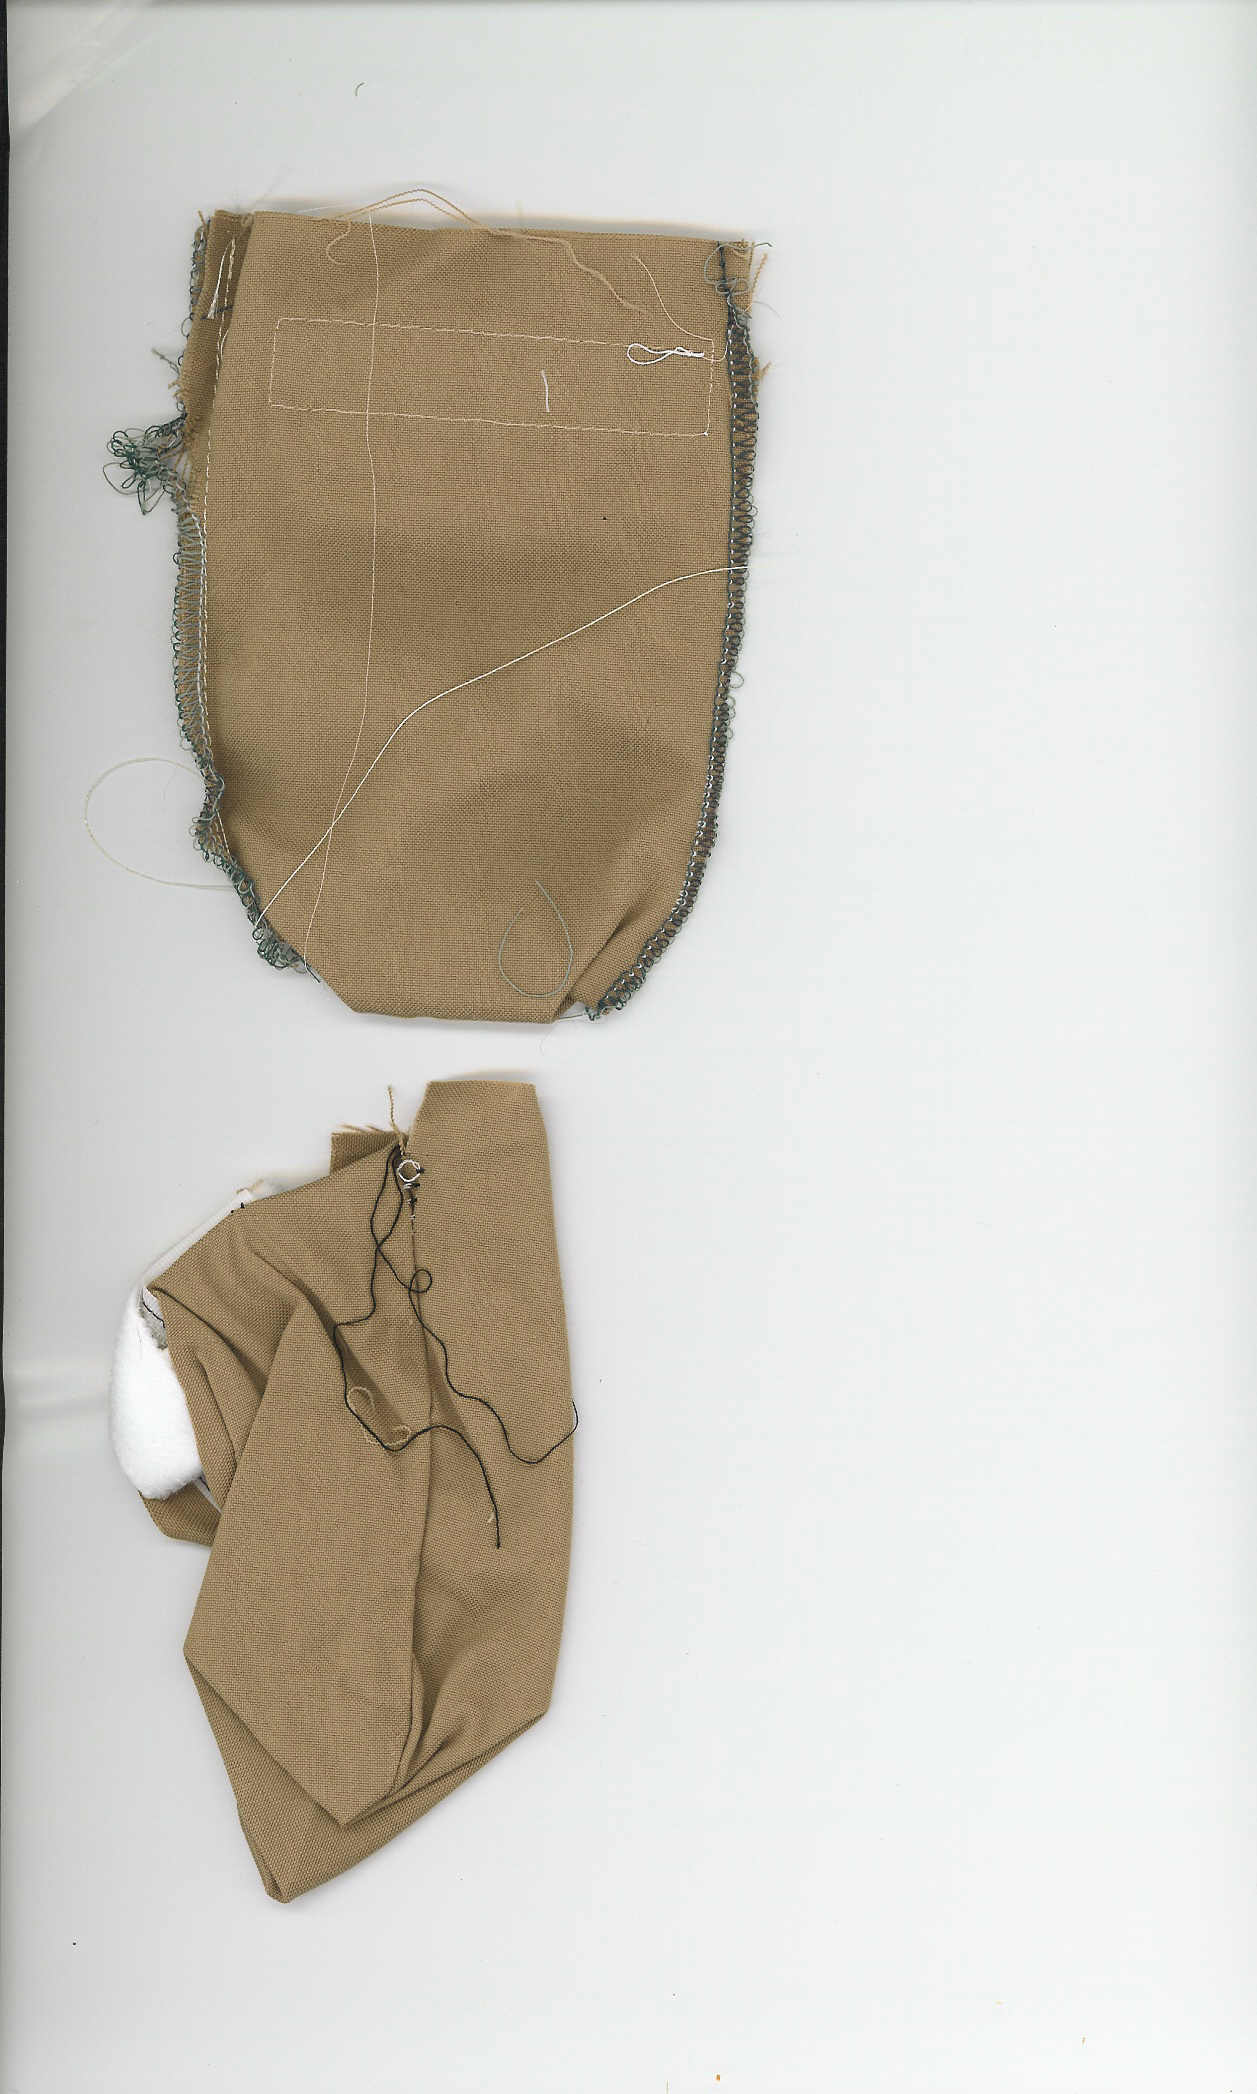
The stitch
length was too long, causing the seams to split under pressure. Think
about putting the bootie on a dog's paw. You would pull on the
seams. They need to hold up to this action. |
|
Also the
tension is not correct between the different threads, and therefore the
stitching is not strong. |
|
It was overcast
too close to the edge of the fabric, which in turn frayed. You need
to use at least a 4-thread serger, otherwise the bootie will fray and
pull apart as in this example. |
|
The top is not overcast or pinked, causing top to ravel and the subsequent
threads to be loose, which can
get caught in the toes of the dogs and interfere with easy application
to the paw. |
|
You can not back stitch with a serger, but there are several ways
to sew down the ends so they do not ravel. Dogbooties.com uses a 5 thread
serger - 2 threads create a straight chain stitch and a 3 thread overlock
next to it. They also have told us a 4 thread serger will work well, with stitches close together. All the loose long threads on
these booties are unacceptable - threads need to be clipped. |
|
The
Velstretch looks not to be sewn down, at all, and appears to be too short
for a medium bootie. |
|
For those of you who don't use a
serger, there are still lessons to be learned from this. Be sure to
pink the top edge. The feedback that I have always received is that
this does prevent fraying for the life of the bootie. Under no
circumstances, should the top be left untouched. |
|
Secondly, be sure the stitching
of the Velcro goes ACROSS the side seam. See the pictures on this
site. In this picture, there is very little, if any, Velstretch that is sewn
down. And it certainly is not stitched over the seam as is required. |
|
Always make sure the seams are
sewn with a large enough seam allowance and short stitches. If the
stitches look funny in any way, your tension is probably goofed up.
Rip out the seam, adjust the tension, and sew again. |